Haiiro
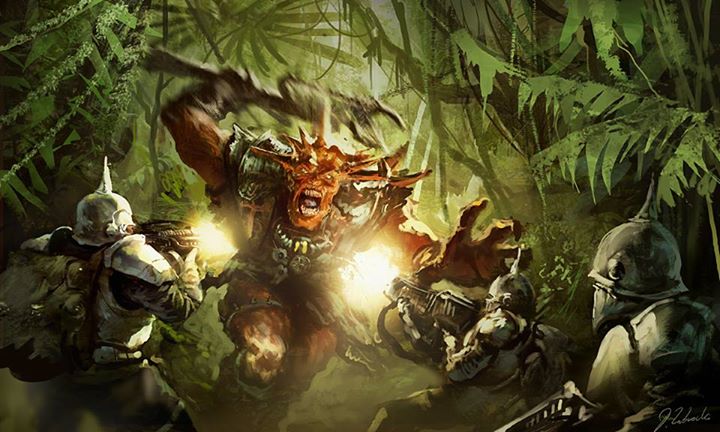
Welcome fellow Warzone fans, to our first battle report, brought to you by your hosts, Underling and Haiiro. While we’re all eagerly awaiting our official Warzone miniatures, several of us have been playing over Tabletop Sim, which is how we got this game in. Expect an article on setting up TTS and playing Warzone Eternal yourselves!
Starting Forces
Underling decided to play Algeroth, and try a list with a ton of bodies, stacking the Legionnaires. The idea was to completely overwhelm through sheer numbers, knowing that the army would need to watch out for losing the Controllers.
Haiiro also decided to play a specialized list, but taking Bauhaus. Leaving the Venusian Rangers at home and doubling (tripling!) down on Mortants and Blitzers. With Mortants moving 5” per move and Blitzer’s having Blitz (very apt), they should be able to move around the board and take any objectives they may need.
Swarm of Algeroth – Underling
- Centurion
- Necromutant Trooper (x2)
- Necromutant Support – Tormentor Flamethrower (x2)
- Undead Legionnaire (x9)
Move Fast and Break Bauhaus
- Etoiles Mortant Leader
- Etoiles Mortant Trooper (x3)
- Etoiles Mortant Support – Sniper Rifle
- Blitzer Leader
- Blitzer Support – Gehenna Puker
- Blitzer Operator
- Blitzer Trooper
- Assets
- Fire Support
- Reliability
Scenario and Set-up
We decided to roll randomly for the scenario and deployment. Haiiro rolled an 18 for deployment and then a 19 for scenario (would his rolls continue to be this bad?). To no one’s surprise, Underling was aligned to the Servants of Darkness with his Algeroth.
Scenario: Sabotage
Deployment: Flank Deployment
Underling Secondaries: Flank, Slaughter
Haiiro Secondaries: Sacrifice
Haiiro deployed first and the first turn began!

Green is forests, yellow, orange, and brown represent cliffs at various levels, each only 1 inch high, for easy play.
Turn 1
As one would expect, Turn 1 was fairly uneventful. Haiiro attempted to lay down a smoke grenade and failed, leaving the terrain completely the same. Models marched forward, getting ready to take advantage of their positions in Turn 2!

Turn 2
Turn 2 started with a bang! Underling was able to take advantage of the terrain and move up the hill on the right east side of the map with his Tormentor. Doing so put himself into position to fire out a stream of fire at the poor Bauhaus that had so kindly lined themselves up!

Things are about to go very badly for some Blitzers!
The Tormentor was able to draw on the Mortant Trooper, a Blitzer Leader, and the Blitzer Support. In a stroke of amazing luck (for Underling!) the Blitzer Leader died from a crit fail on his armor save! The only comfort from all of this is that the Tormentor will need to Reload next turn.
Haiiro wasted no time trying to set the record straight, but failed to make any progress – failing an ambush with his sniper, and a leadership test with his Mortant Leader. All the while Underling marches his forces up the board.
To add insult to injury, a Legionnaire moves forward and takes a successful shot at the Blitzer Operator – who immediately fails his armor save, with a nat 20 (did Haiiro bring his DnD dice by mistake?).

This poor Operator didn’t even get a chance to act this turn!
At the end of Turn 2 Haiiro has lost roughly 20% of his force and all that Underling has to deal with is a Reload! This wanton slaughter gives Underling a 1 for, well, Slaughter! Not all is lost however, as the slow undead were unable to get to Haiiro’s deployment zone, scoring him a single point for Hold Ground.

Positioning at the end of Turn 2
Turn 2 Score:
Underling: 1
Haiiro: 1
Turn 3
Turn 3 starts remarkably similar to Turn 2. Underling goes first and reloads his Tormentor, aiming at all three of Haiiro’s remaining Blitzers. While Haiiro decides that enough is enough and Counterattacks with his own flamethrower – the Puker! His Blitzer Leader dies to the Tormentor’s flame, but the Puker returns the favor, destroying the foul zombie.

Tormentor back at it again!
Haiiro takes a gamble and moves his Blitzer Trooper into contact with the Centurion – hoping that it can survive long enough to score at least a point for Sacrifice. Unfortunately, this is not meant to be, as the Centurion deftly cuts down the Trooper later in the turn, denying Haiiro his point. This also gives Underling the second kill he needs for Slaughter!
But not all is lost! The Puker comes back into play – killing a Legionnaire, granting him free movement! He’s further up the board, but maybe not as far as he needs.
On the western side of the board, Underling manages to pilot one of his Undead Legionnaires to a Scenario Marker and damage it. This really puts the pressure on Haiiro for scoring points.

The rest of the models move into clash, but fail to do much to one another, other than increase their animosity. The Sniper manages to score a critical hit against an Undead Legionnaire. The Legionnaire, in a display of absolute brilliant trolling manages to roll a 2 on both dice, saving him from damage. The Sniper shoots again and the Legionnaire continues to be a thorn in Haiiro’s side, saving with a 1.
Despite everything, Haiiro’s deployment zone is still safe, granting him his second point from Hold Ground.

Positions after Turn 3
Turn 3 Score
Underling: 3
Haiiro: 2
Turn 4
Underling takes a swing against the Blitzer Puker and fails to kill. The Puker again chooses to Counterattack, taking out the Legionnaire once and for all – and allows the Puker to march forward with Blitz! The Puker gets into contact with the Scenario Marker. He opts to take a shot at the Centurion, who fails, lowering the Algeroth leader to only one hit point. He uses his final action to attempt to damage the Scenario Objective, but fails his test!
The Centurion looks at the board and needs to make a choice that many of us will have to make in this game – murder or points? The Blitzer is right there, ready to be snuffed out, but can he rely on a sole Legionnaire to get into Haiiro’s deployment zone by Turn 5 to score Flank?

The eternal (ha!) choice, murder or points?
The inner turmoil challenges Underling, but being a man of principle he decides that the points are more important (Haiiro would have murdered the dude, but this is why Haiiro doesn’t win very often).

Points win!
On the western flank and the center of the board Haiiro manages to take out a Legionnaire, allowing him to get a Mortant into a better position for the Scenario Objective for Turn 5. No one managed to damage the Scenario Objectives this turn, and being maxed out on Slaughter and Hold Ground, the score remains tied.

Positions after Turn 4
Turn 4 Score
Underling: 3
Haiiro: 2
Turn 5
Turn 5 is all about getting points! Haiiro’s sniper tries to kill a Legionnaire one more time, and still fails!
The Blitzer Puker tries again to damage the Scenario Objective and gets it, and the Mortant Trooper on the western side of the board is able to move away from the Legionnaire she is engaged. Since the Legionnaire is outside of 6” of a Controller, he’s not able to React, giving the Mortant the actions to get into contact and damage the other Scenario Objective.

This Mortant right here saved the game.
Underling tries his best to kill what he can, but fails to damage any models enough to change the outcome of the turn. He also isn’t able to damage a Scenario Objective himself. Which gives Haiiro both points for Sabotage at the end of Turn 5.
Miraculously for Haiiro, this causes the game to end in a draw: 4-4!
Final Score
Underling: 4
Haiiro: 4
Aftergame and Lessons Learned
So what do you all think? Do you find this battle report engaging? Now, since we were playing over Tabletop Sim and the game is not out yet, we have to admit that it took quite a bit of time to play (with a break to go to a birthday party even!) We may have made some rules mistakes as well, so feel free to let us know below!
As for things learned during the game, I walked away with three major points.
- Dice rolls come back around – you may be failing every test Turns 2 and 3, but statistically, they’ll come back around. Stay in the game and don’t give up
- Blitz is my new favorite ability – damn, did my Blitzers get some real utility out of this! Don’t forget it!
- Flamethrowers will absolutely wreck you if you let them – Not only does the attack hit multiple people, but Continuous as an ability makes it even harder for you to save your poor dudes. Take your opponent’s out quick and use yours strategically!
Now that’s all for now folks. We’re all eagerly counting down to get our models in hand and writing battle reports like this for you, but with our (maybe poorly) painted models!